Wildflower Macro Photography
by Keith Lightbody 23 May 2015
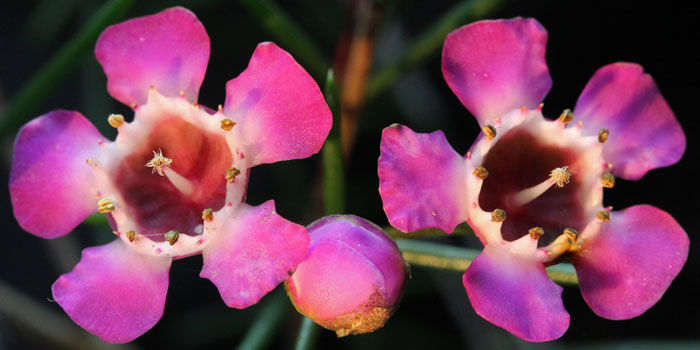
Geraldton Wax (Chamelaucium uncinatum) - up very close!
Canon 650D, 100mm L IS Macro, f10, 1/13sec, ISO1600, -0.7ev, tripod, cable release
This photo was taken during a demonstration at
Eastern Hills Wildflower Society hall.
Macro camera equipment allows photographers to take photos of small subjects and produce large images that capture amazing detail and show unseen features. It allows the viewer to get up really close to nature. Good wildflower photography requires technical excellence, a creative spirit and the artistry of a florist.
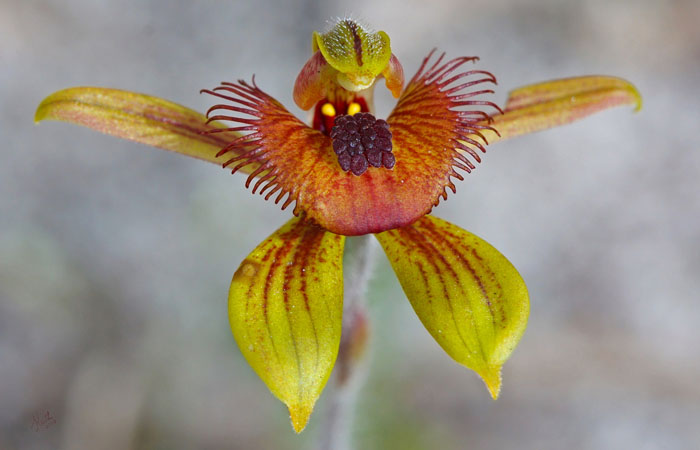 Bee Orchid (Caladenia discoidea) - glistenening after a rain shower
Canon 450D, EF 100mm Macro, f10, 1/80sec, ISO400, -0.3ev, tripod, cable release
Basics
These notes are written to help someone who has been using a camera get good clear photos that show a subject up very close. In macro photography it is usually a challenge to get all the key parts of a subject in focus while still maintaining a soft non-distracting background
- depth of field/focus refers to the range of distance where objects are in focus
(i.e. the subject parts that are in focus from near to far from the lens)
- being very close to the subject typically results in a low depth of field
(e.g. only a few millimetres of the subject may be in focus)
- large apertures (e.g. f2.8) give a smaller depth of field
(maybe only a few petals of the flower are in focus)
- small apertures (e.g. f13) give a bigger depth of field
(maybe both the flower and background are in focus)
- being very close to the subject can require low shutter speeds to get enough light
- low shutter speeds (e.g. 1/5 sec) may give blur from subject motion or photographer shake
- tiny subjects only require a very small movement to cause blurring
- good weather with still or light winds and moderate sunshine is best
(it is difficult to get good macro results in strong winds or bright mid day sunshine)
- using a tripod, mirror lock up and a remote release usually gives better results
Equipment
Many compact/point-and-shoot digital cameras have great macro features that can be activated by a simple menu choice or dial selection. Digital Single Lens Reflex (DSLR) cameras have many common lenses but the interchangeable lens design allows the use of special 1:1 macro lenses that provide higher magnifications. Some common macro lens sizes include 60 mm, 100 mm and 180 mm. These macro lenses all provide the same magnification but at different distances from the subject (it is completely different to normal lenses where a 15 mm lens is wide angle and low magnification while a 500 mm lens is super telephoto and very high magnification!). A 100 mm macro is safe choice if you are starting with a ‘crop’ DSLR (e.g. Canon 500D, Nikon D90). You also need a lightweight but stable tripod that has quick release locks on the legs and is adjustable close to ground level. Finally do not forget to check all lenses are clean, all memory cards are empty and the battery is fully charged. NOTE: additional items are listed in a more detailed checklist below.
Locations
There are opportunities for macro photography everywhere but in Western Australia we are fortunate to have many parks, nature reserves and roadside verges with wildflowers. A simple Internet search on “wildflower locations” can help uncover places to visit and also wildflower groups, clubs or societies. For me it is more about the beauty of the final photograph, not the rarity of the plant but it is essential that any wildflower photography activity does not endanger the plant or spoil the location for others. Please do not leave markers at locations.
Composition
Before you even get out the camera look carefully all around to appreciate what plants and flowers are present. You might see one plant in flower but there may be a few others you could tread on if you do not look! Visualise the options for your photograph as the point of view you choose is critical – with wildflowers your camera position and height above the ground are usually the only way to ‘arrange the flowers’. The final result will also depend on your camera, lighting and background skills.
- set up your tripod, camera and remote release to capture your vision
- a ‘Live View’ feature on your camera is very helpful
(it allows you to preview the composition, zoom in at 10 x magnification and focus accurately)
- most compositions work best if the dominant subject feature is in sharp focus - in general a view ‘square on’ to the subject is not as interesting as a view at ‘just the right angle’ which can add depth and show the subject parts better (the challenge is to find the ‘magic’ angle that gives the subject the most life)
- you may also be able to ‘tweak’ the composition by securing a distracting part with a soft chenille stem/pipe cleaner, stocking or similar but do not risk any harm to the subject or nearby plants.
Background
Avoid any distraction from the main subject if you want the focus to be on the flower. However it is also possible to include the background to show the natural habitat of the plant.
- one of the techniques I now use is to first focus on the background
(so I can see clearly what is prominent: a light coloured blade of grass
or branch may produce a distracting line in the final image)
- next I consider my reframing options by adjusting my camera position
(but only if I can still get a really good composition of the subject)
- consider the colour contrast between subject and background
(complimentary but contrasting colours can help to highlight the subject)
- if reframing is not possible I try to gently secure the offending items out of frame
(using the strap of my camera bag, soft chenille stems/pipe cleaners, nearby branch, etc)
Lighting
Good lighting is critical to show the full details of a wildflower. Many people get striking results using only natural light. Reflectors or umbrellas sometimes help.
- need sufficient light to freeze any subject motion
- too much light can wash out the colours or over expose light coloured areas
- need to avoid shadows on the subject from other flowers, stems or nearby plants
- reflectors can be used with natural light or flash for backlighting
- check the angle carefully if there are reflections or flower has a strong sheen
- internal, ring or external flash can be used but may need a soft setting or diffuser
(flash illumination may produce a flat or unnatural photo with a very dark background)
Settings
A wide variety of macro techniques can produce appealing photos so experiment to find winning combinations for your particular subjects, environment and audience. Digital photography allows many attempts. However to find the best photo can take ages cross checking many similar images at 100% magnification on your computer!
- use manual focus on the feature spot of flower selected during composition
(AF = Auto Focus, MF = Manual Focus on switch on side of lens)
- for best results take photos using a tripod and remote shutter release
- after you have taken a few photos review your images and check the histograms
- use exposure bracketing to get the best possible lighting
(try -1/3, 0, +1/3, check histogram, confirm later at 100% magnification on your computer)
- use aperture bracketing to see the effect of different depths of field
(try 2.8, 4, 8, 11, 13, confirm later by comparison at 100% magnification on your computer)
- increase your ISO setting to about 400 to reduce the need for slow shutter speeds
(ISO 100 = slower shutter, less noise, ISO 1600 = faster shutter, more noise)
- include insects or spiders in the photo if they are on or near the flowers
(use manual focus on the insect’s eye or try auto focus if the insect is moving)
- experiment with focus bracketing to get all parts of the flower in focus
(try focus on stem, front, middle and rear of flower, align and compress with software)
NOTE: bracketing will give better results if used in nil wind with a tripod and cable release
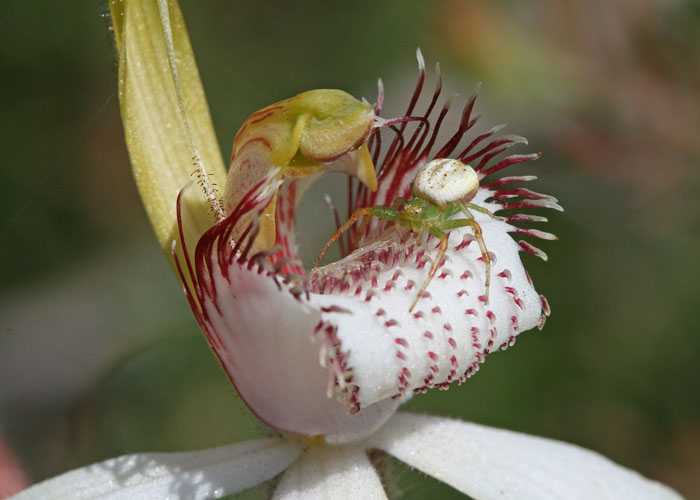 White Spider Orchid (Caladenia longicauda) - note the live spider!
Canon 400D, EF 100mm Macro, f11, 1/250sec, ISO400, -0.3ev, tripod, cable release
Post Processing
Occasionally my photos are great straight out of the camera but most times I crop, reduce noise, tweak the highlight/shadow balance and apply some sharpening. I always view my work at 100% on a large, good quality computer screen. I mostly use Photoshop for editing and Canon Zoom Browser to analyse my best and worst camera settings.
- load all photos onto new folder on hard drive (I take both RAW and JPG)
- first I preview all photos full screen with Windows Photo Gallery or Zoom Browser
(noting best photos based on composition, focus, lighting, colour, movement, etc)
- second I compare my best photos 2-4 at a time side by side in Photoshop at 100%
- next I select the best photo of a particular subject and process it fully
(if necessary adjust noise, shadow/highlight, clone out distractions, adjust sharpness)
- I then crop and save multiple versions of the photo, typically wide screen, 2x3 and A4
- review final selection of photos and hopefully get a feeling of great satisfaction
- open originals in Zoom Browser and try to identify my poor camera setting choices
- backup all originals and processed images to external hard drive and burn to DVD
- erase all backed up originals from memory card, format card about once a month
NOTE: for rapid learning of camera skills always process your photos the same day you take them, choose your best photos but also identify what settings produced best and worst results!
Celebrate!
Once you have produced a work of art, celebrate the achievement and share your photos
- set your very best photo as your desktop (you may need a wide screen version e.g. 16:10)
- share your best efforts by email to your friends, family, work colleagues
- load your best photos on your iPhone or similar so you can show others
(also helpful when meeting people for discussing identification or sites)
- share some of your photos online via Flickr, your own website, etc
- print it on photo paper and frame it or print it on canvas and mount it
- print out a great photo at poster size and display it in your house or at work
- compile a collection of your best photos and set as a screen saver for you or a friend
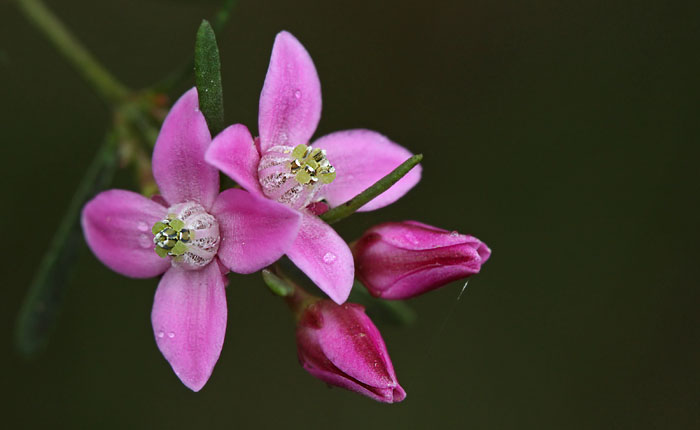 Pink Boronia (Boronia pulchella) - taken during misty rain
Canon 450D, EF 100mm Macro, f8, 1/30sec, ISO400, -0.3ev, tripod, cable release
Checklist
- bag/backpack, camera, memory cards, charged battery, macro lens, wide angle lens
(test everything is together and working BEFORE leaving on your outing)
- tripod, remote shutter release (cable/wireless)
- cleaning items: lens cloths/micro-fibre cloth, blower, lens brush
- camera instruction manual (but better if you know your camera well)
- maps, emergency contact (mobile phone, emergency beacon/ epirb)
- water, sun protection, insect protection, knee pads, first aid, snack
- note book, pen, cloth measuring tape/rule, small roll adhesive tape
- optional for quick attachment of camera: tripod quick release plate
- optional for additional lighting: flash, diffuser, fold-up/collapsible reflector
- optional for stabilizing subjects: soft chenille stems, clamps, fold-up wind guard
- optional for greater magnification: extension tubes, close up lenses, bellows
- optional for focus stacking: focusing rack
Resources
Life is so much easier now that you can access references from all over the world in seconds.
- use the Internet to find new wildflower locations e.g. satellite photos, Google Maps
- identify species using both Web Search and Image Search e.g. Google Images
- search for online tutorials, guides, etc to develop your photography skills
- collaborate with other photographers (via email, camera forums, etc)
- FloraBase http://florabase.calm.wa.gov.au/
- Focusing Rack http://goto.glocalnet.net/savazzi.net/photography/focusing_racks.htm
- Holding Clamp http://www.fmphotography.us/html/mcclamp.html
- Kensington Bushland http://www.vicpark.wa.gov.au/Herbarium/index.htm
- Map Perth Wildflowers http://members.ozemail.com.au/~wildflowers/Perth.htm
- North Lake Plants http://www.warwickhughes.com/flora/flora_pics.htm
- 1:1 Macro
- Orchids of WA http://en.wikipedia.org/wiki/Orchids_of_Western_Australia
- Species Orchid Society http://members.iinet.net.au/~emntee/page18.html
- Terrestrial Orchids http://www.webace.com.au/~chook/orchids/
- VIC Orchids http://www.retiredaussies.com/ColinsHome%20Page/orchids_Introduction.htm
- WA Native Orchid Society http://www.wanativeorchidsociety.net/
- WA Orchids http://www.flickr.com/photos/madfish_wa/sets/72057594054981647/
- WA Wildflowers http://www.wildflowerswa.com/en/WA+Wildflowers/default.htm
- Wildflowers of WA http://members.westnet.com.au/aycee/links.htm
- Wildflower Society of WA http://members.ozemail.com.au/~wildflowers/
- Wildflowers in the West http://www.wildflowerswa.com.au/
- Wildflowers of Western Australia http://www.worldbotanical.com/australia.htm
- Workshop Camera Club http://www.workshopcameraclub.org.au/
Focus Stacking in Photoshop CS4
Place just the photos to be used for the focus sequence all in a single folder
(with a 15 MPixel camera any more than 4 photos may not Auto Blend due to lack of memory)
Drop one of the photos into Bridge CS4 (or open Bridge and locate the focus sequence folder)
In Bridge select all the images then choose:
Tools > Photoshop > Load Files into Photoshop Layers
(this loads all photos into Photoshop as multiple layers in a single image)
In Photoshop CS4:
Select > All Layers
Edit > Auto-Align Layers
Projection: Auto, Lens Correction: tick Geometric Distortion
Click OK
Edit > Auto-Blend Layers
Select Stack Images from the Auto-Blend dialog box.
Leave Seamless Tones and Colours selected.
Click OK.
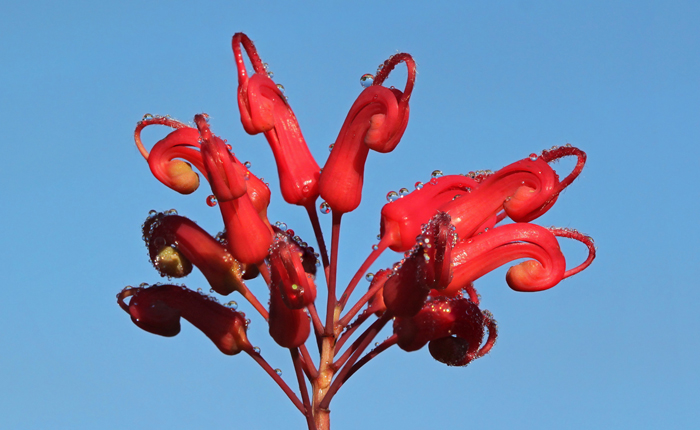 Grevillea (Grevillea wilsonii) - focus stack of 4 photos
 Canon 500D, EF 100mm Macro, f8, 1/800sec, ISO400 -0.3ev, tripod, cable release
Identification
Accurate identification is sometimes the hardest part! My strategies include:
- searching online for websites by other people with an interest in the same locality
- talking to rangers in National Parks or other conservation areas
- checking local and regional libraries or bookstores for any books with helpful information
- looking for any brochures, signs, post cards, paintings or souvenirs that have flower names
- searching online via Google images for photos of same or similar species
(but often after some guessing to get started on a scientific or common name)
- visiting wildflower shows, tourist centres or other places keen to promote travel
- asking around for any other local people who also have a passion for nature
- visiting or joining a nature group, environmental association or photography club
(meet others with like interests, gain contacts, get newsletters, library access, research trips, etc)
- talking to any other photographers I see in the field
- sharing my photos with others interested in nature
- staying in a variety of local accommodation
I always take a collection of my best wildflower photos with me - either printed on A4 paper in a plastic folder or on an iTouch/iPhone/iPad. Often when people see good photos and understand your respect for nature they may consider helping you with identification, offering additional contacts or divulging special locations.
However once you think you have confirmed identification with a full scientific name you still need to cross reference via multiple web sites, books or other sources to ensure accuracy (some photos online are not correctly identified, some plants have been reclassified in recent years)
Site credit: These notes were created after a lot of practice. Feedback from Ashley Walker, Jay Steere, Terry March and others has been included. First published online in spring 2009. Comments welcome.
More of my photos are available at
http://www.zardec.net.au/keith/photos.htm
My email: