Preparing lineart in Photoshop
written by Jade ( http://www.zardec.net.au/aldas/ ) in 2011
This tutorial explains how to separate your scanned lineart (ie. a sketch or inked drawing) from its background, so that is left on a transparent layer. Doing this allows you to colour the lines, which creates a much softer and less cartoony effect than leaving them black.
STEP 1:
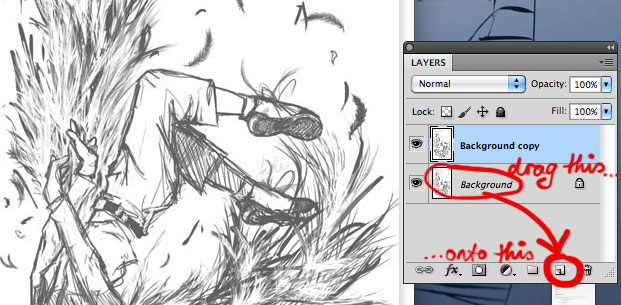
Make sure your lineart isn't on the background layer (which has a padlock symbol next to it indicating it's locked) as this layer doesn't allow transparency.
To shift it to a new layer you can either select everything on the layer then copy & paste it, or you can just drag the background layer onto the 'Create new layer' button (shown circled in red below) to duplicate it.
STEP 2:
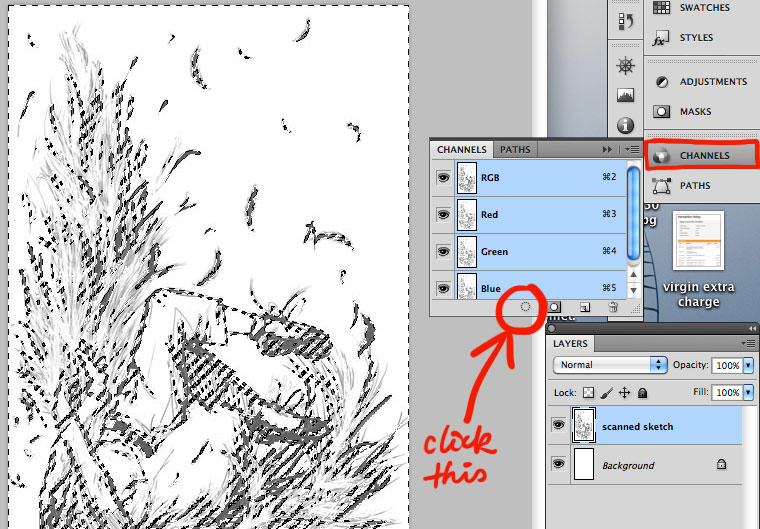
Next you need to open up the 'Channels' window. If you can't find it on your screen, go to 'Window' in the top menu bar and select it from the list.
Once it's open, make sure you have the layer with your sketch on it selected, then click the button circled in red below. This will select all the white in your image. Hit delete on your keyboard.
STEP 3:
Your lineart will now be on a transparent (rather than white) background.
Making sure the layer is highlighted in the layers palette, lock its transparency (the icon circled below).
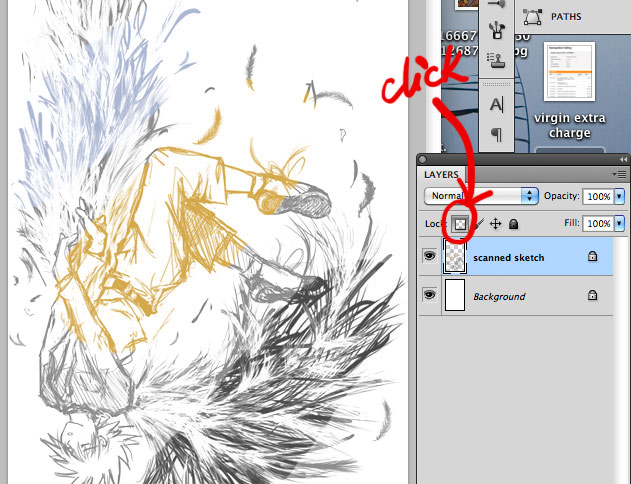
After locking it, you'll be able to use the brush tool to change the colour of the lines at will. If you want them dark, go back over them with black as they will have become a bit lighter when you deleted the background. Otherwise, I recommend colouring them a shade darker than whatever colour they surround. Eg. If you have filled in the characters skin tone with cream (on a separate layer, as per this tutorial) then I would make the lines around those areas brown. Experiment and see what you like best!
I hope this guide has been helpful in some way. If you have any questions or suggestions for improvement for this tutorial, feel free to contact me at jadeao at gmail.com